/blog/images/avatar.png

Rocket RISC-V processor - Adding a custom CSR, hardware point of view

Introduction

In the context of a research project related to RIMI [1], we need to add a new CSR (Control & Status Register) in the Rocket processor [2] in order to store new security settings. There are obviously modifications to do in the hardware description of the processor. This blog article tries to sum up what needs to be done.

Hardware stack of the Rocket Chip

The first difficulty with the Rocket Chip is its implementatinon langage, Chisel. It is recommended to learn the basics before going deeper in the Rocket Chip. Some resources:

Rocket RISC-V processor - Adding a custom CSR, software point of view

Introduction

In the context of a research project related to RIMI [1], we need to add a new CSR (Control & Status Register) in the Rocket processor [2] in order to store new security settings. There are obviously modifications to do in the hardware description of the processor (it will be the topic of a future article). However, we also need to modify a few lines of the software stack.

How to add a processor in LiteX?

Introduction

Two methods can be done:

  • Including the processor code in LiteX framework (see CV32E40P [4]).
  • Importing the processor code from an external repository (see FemtoRV [5]).

The choice mainly depends on how the HDL code is written. This tutorial focuses on the first method as targeted processors will be composed of several HDL files. We will see later how it is configured.

LiteX workflow for custom processors

This tutorial is based on the work done by Antmicro for the CV32E40P [4].

Arduino Due vs. embedded C - ARM reversing

  • arduino-cli: Command Line Interface for Arduino
  • ARM cross compiler: sudo apt install gcc-arm-none-eabi

Sample program

../img/arduino-due.jpg

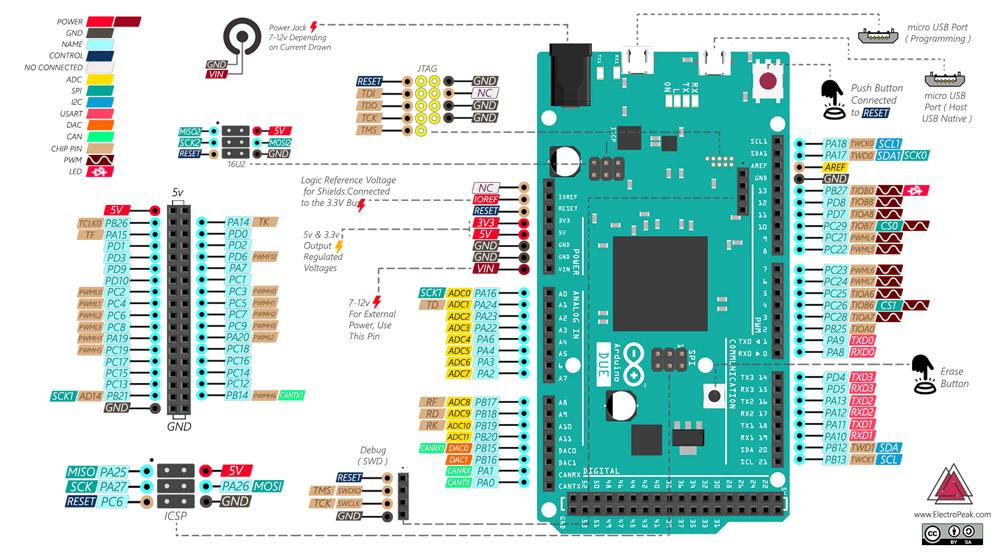
We want to create the most simple program which goal is to light on the built-in LED, located at port PB27 on the Arduino Due.

Arduino

void setup()
{
    pinMode(LED_BUILTIN, OUTPUT);
}
void loop()
{
	digitalWrite(LED_BUILTIN, HIGH);
}

Embedded C

int main()
{
    PIOB->PIO_PER = 1<<27;       /* Enable port PB27 */
    PIOB->PIO_OER = 1<<27;       /* Configure PB27 as output */
    PIOB->PIO_ODSR = 0xFFFFFFFF; /* Write 1 in all PORTB ports */
    return 0;
}

Codes and compilation

$ ls -lR
./led-arduino:
total 4
-rw-r--r-- 1 pascal pascal 104 mai    1 12:58 led-arduino.ino
./led-embedded:
total 4
-rw-r--r-- 1 pascal pascal 81 mai    1 13:00 led-embedded.ino
$ arduino-cli compile --fqbn arduino:sam:arduino_due_x --output-dir led-arduino led-arduino
$ arduino-cli compile --fqbn arduino:sam:arduino_due_x --output-dir led-embedded led-embedded

Binary comparison

Arduino Embedded C
Storage use 10660 bytes 2544 bytes

The embedded C code is 5 times smaller than the Arduino one which is a bit “weird” as both codes do the same thing! Let’s find why by reversing binaries and analyzing assembly codes.

Arduino vs. embedded C - AVR reversing

As I was teaching some embedded C basics, I was asked what are some benefits of embedded C over the classic Arduino language for an Arduino-based board. This article tries to see what we can do by reversing a really simple program compiled with both methods for the Arduino Uno.

Prerequisites

  • arduino-cli: Command Line Interface for Arduino. You will need to install the AVR toolchain as well: arduino-cli core install arduino:avr
  • AVR cross compiler: sudo apt install gcc-avr
  • Optional: an Arduino simulator such as SimulIDE

Sample program

../img/arduino_blink.jpg